Getting Started in 10 Minutes
The best way to get familiar with RapidHarness is to simply try using our software!
RapidHarness is completely free to get started (only an email address is required), and should allow you to download, install, and create your first harness in under 10 minutes!
Step 1: Download and Install
Visit our Download page to download and run the RapidHarness installer.
After installation, the software will guide you to create your RapidHarness account.
Step 2: Create Your First Harness
The best way to get started is by creating a Harness drawing with a few connections:
- Click 'New Design' under the start menu, and then click Harness
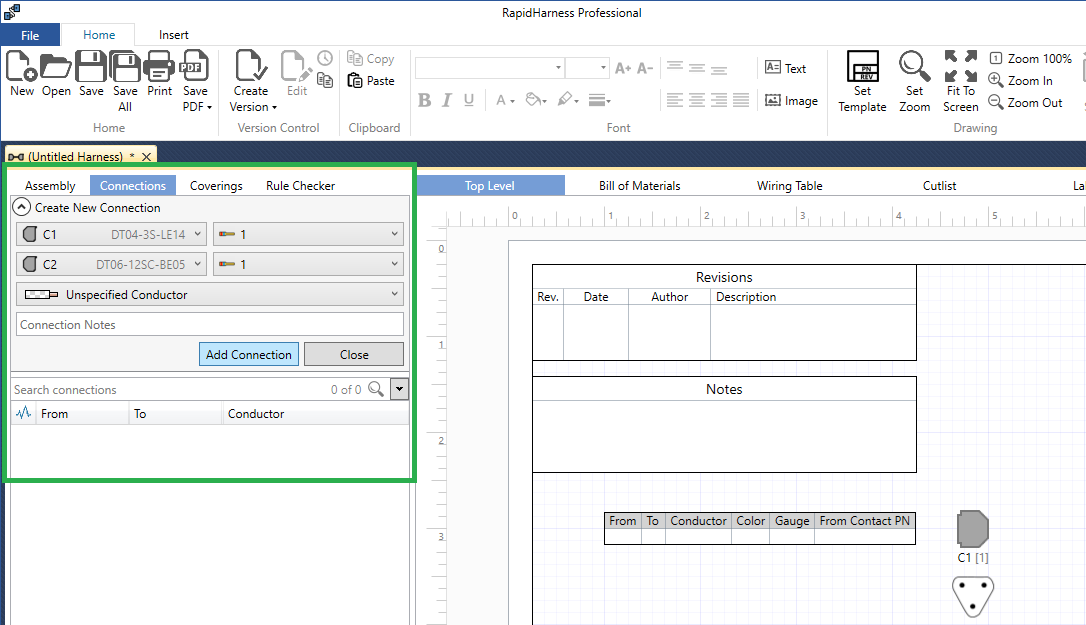
- Click the 'Connections' tab on the left
- Click the 'Create New Connection' dropdown
- Specify a 'From' and 'To' endpoint for a new Connection
-
Click 'Add Connection'. This automatically updates your:
- List of Connections (on the left)
- Top Level drawing
- Bill of Materials
- Wiring Table
- Cutlist
- Click 'Create New Connection' to add more connections, or
- Double Click your Connection to edit it

Step 3: Going Further
For more information on designing with RapidHarness, see the following topics and tutorials:
Further Questions?
We're happy to help with any questions you may have! You can always search our documentation, or Contact Us if you need further help.